
Create a VPN With AWS: Amazon Web Services gives one year of free virtual server range, given you use less than decided amounts of bandwidth, time, and space. Even if you go over that limit, the charge of running a server image on Amazon’s Elastic Compute Cloud is seemingly less than you would pay for a VPN subscription.(also see, Best VPN for Cloud Services in 2018)
Create a VPN With AWS- How to Create Your Own FREE VPN Server Using AWS-Amazon Web Services?
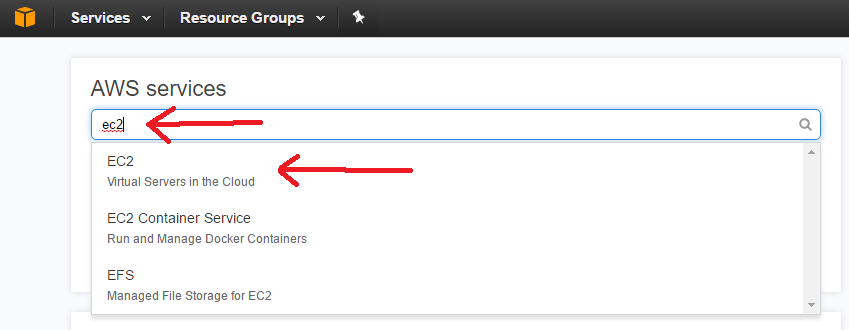
Here we’ll explain the way to Amazon’s Elastic Cloud service, also called EC2, to divert your connection through a private location of your choice.
Get Started -Create a VPN With AWS
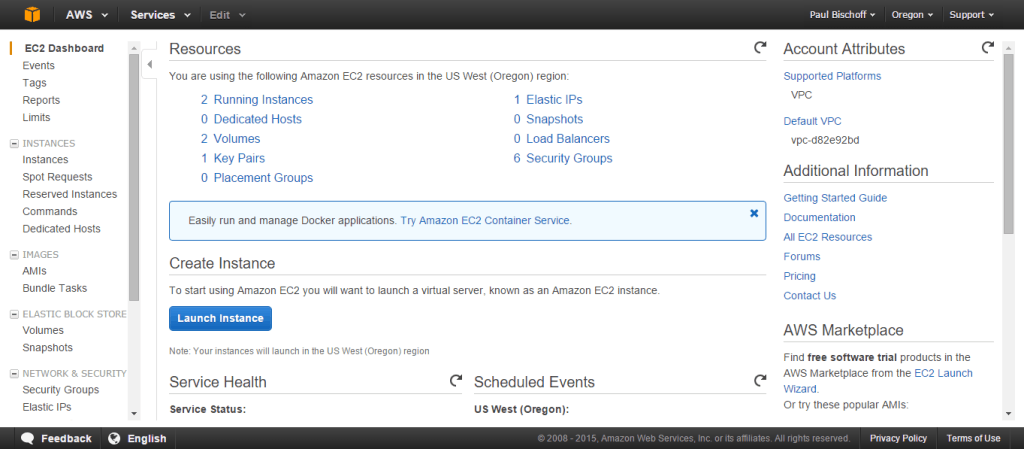
Log into your Amazon Web Service account and head to the EC2 dashboard.
On the top right, choose the location where we’ll be setting up your VPN. Click Launch Instance.
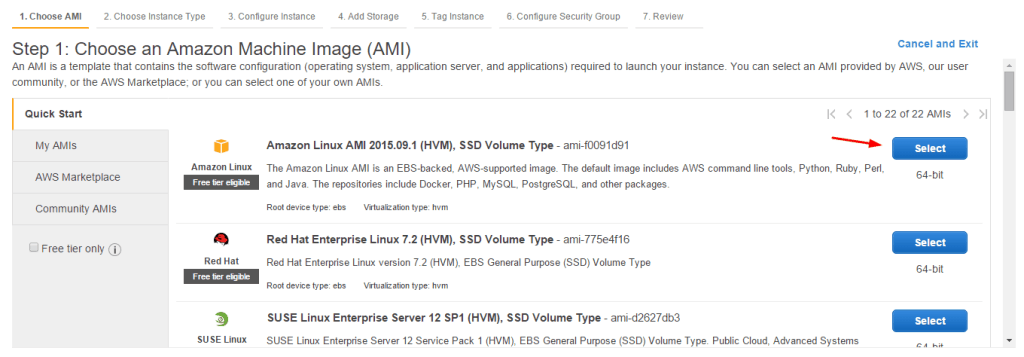
Choose whatever Linux AMI is listed as “free tier eligible.” Go on to the next step.
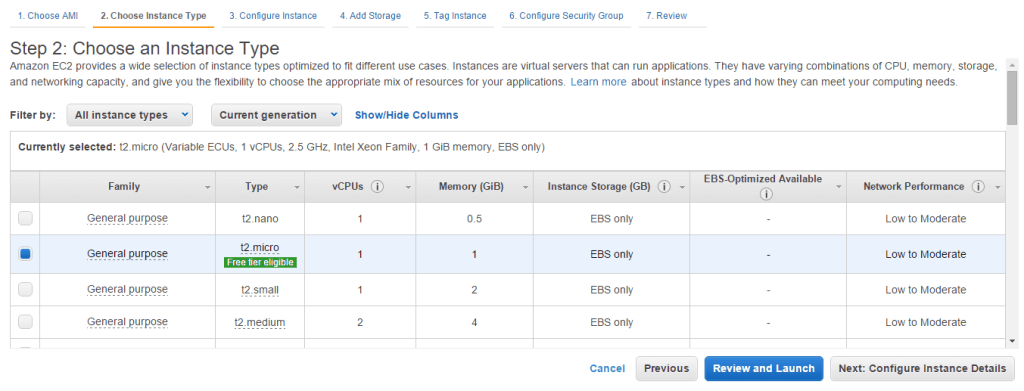
Choose a t2.micro instance. Click “Review and Launch.”
On the next page, you’ll get a warning message. Click Edit Security Groups.
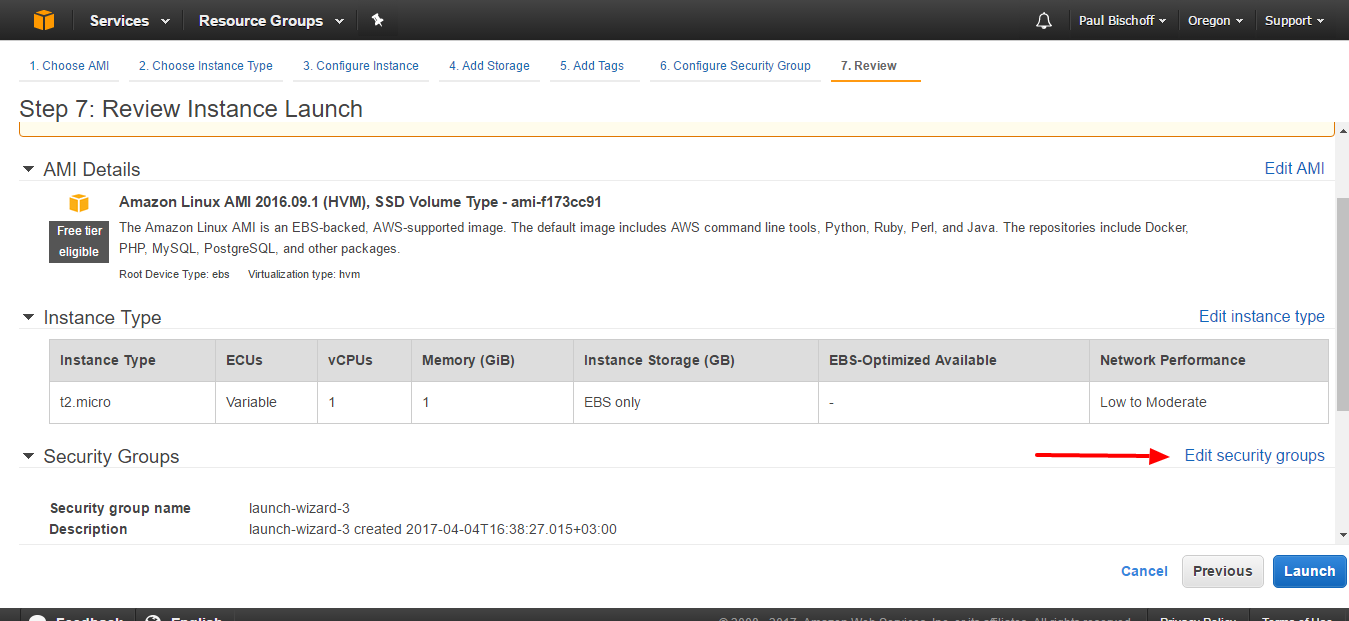
You’ll need to edit the security group only to enable traffic from your computer to access the VPN or proxy. You must have one rule already in place for connecting to your server via SSH. For simplicity’s sake, under the Inbound tab, click the Add rule button. Set the Type to Custom UDP, the Port Range to 1194, and the Source to Anywhere.
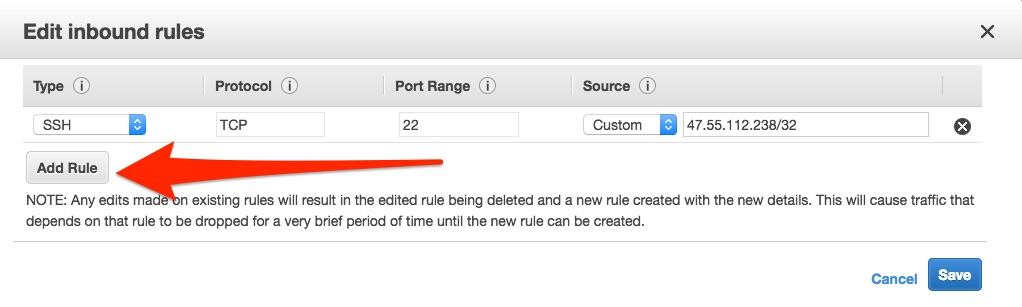
Click Save.

Click “review and launch,” then “launch” on the next page.
Select “create a new key pair” from the drop-down menu and name it whatever you like. Click the button to download the key pair. Store it somewhere safe. Read on to know more about Create a VPN With AWS.
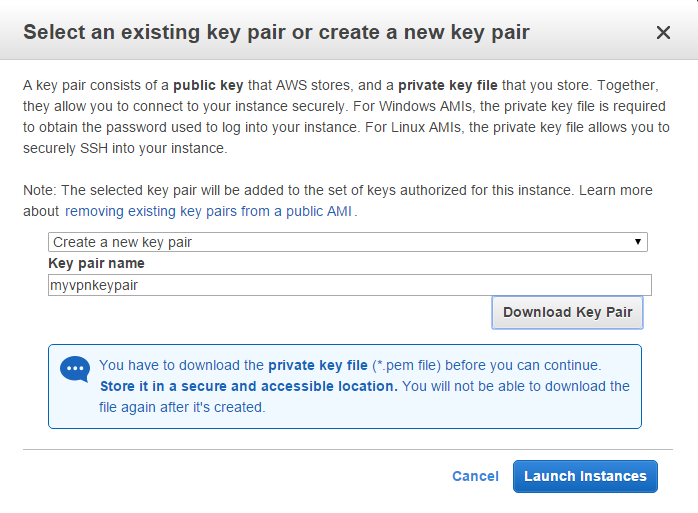
Scroll to the bottom and hit “View instances.”
We can connect to our EC2 instance with PuTTy, but first, we’ll need a proper key file to get connected. When you installed PuTTy, you should have also installed PuTTygen. Go ahead and run it now.
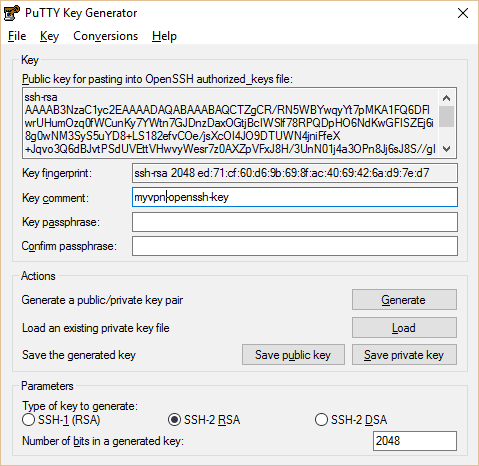
PuTTy and PuTTygen both run directly out of the box as .exe files with no requirement to install. Open PuTTygen, click Load. Navigate to the .pem key pair file you downloaded before and load it into Puttygen. Select the choice to show all file types for the .pem key to show up. Hit “Save Private Key.” The file name must be identical to the .pem key.
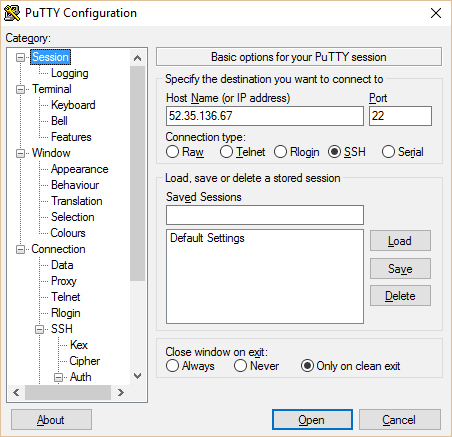
Now open PuTTy. Copy your instance’s public IP from the EC2 console into PuTTy. Set session name and click save.
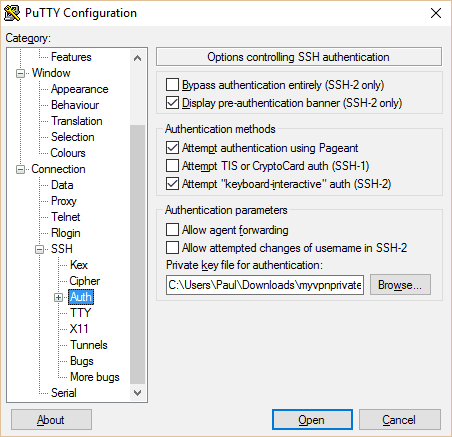
In the left pane, go to “Auth” under SSH. Click on the browse button at the bottom and navigate to the private key you just created.
Name and save your session profile. Then click Open. A prompt will show up asking you for a username. This varies based on what kind of server you set up. For the Amazon Linux AMI, it’s “ec2-user”.
Set up OpenVPN on the Server and Client
OpenVPN is a free open source tool that will allow you operate a full-on VPN through your Amazon EC2 instance(also see, OpenVPN Explained – What Is OpenVPN & How Does It Work?)
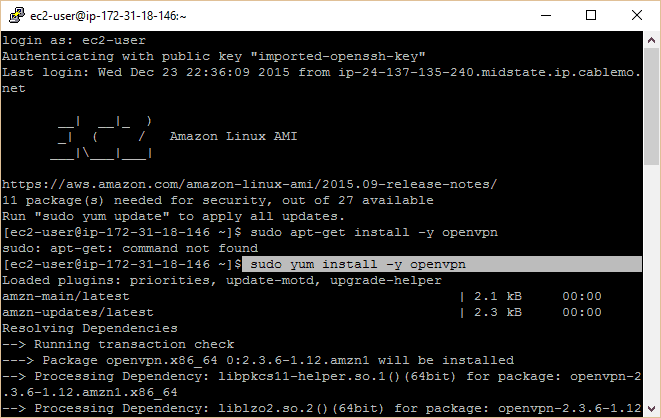
Connect to your EC2 instance utilizing PuTTy according to the directions above. You should have a command prompt in front of you that states Amazon Linux AMI. Run the following commands (type or copy/paste them and press enter):
sudo yum install -y OpenVPN
sudo modprobe iptable_nat
echo 1 | sudo tee /proc/sys/net/ipv4/ip_forward
sudo iptables -t nat -A POSTROUTING -s 10.4.0.1/2 -o eth0 -j MASQUERADE
sudo iptables -t nat -A POSTROUTING -s 10.8.0.0/24 -o eth0 -j MASQUERADE
Setting up PKI Authentication with Easy-rsa
We recommend readers use easy-rsa to set up authentication, which is more secure and enables for any number of devices to be concurrently connected.
Type the following into the PuTTy terminal and hit Enter after each:
sudo yum install easy-rsa -y –enablerepo=epel
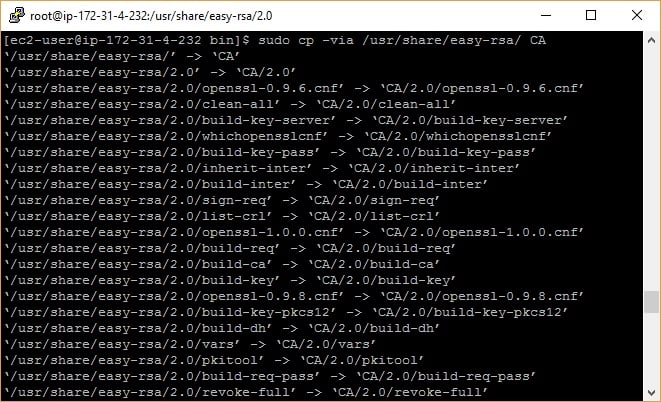
sudo cp -via /usr/share/easy-rsa/2.0 CA
The second command generates a directory with all of the effective files we need to set up our certificate authority.
For the next steps, we need to be the root user. In the Amazon Linux AMI, by default, you can access root with the following command:
sudo su
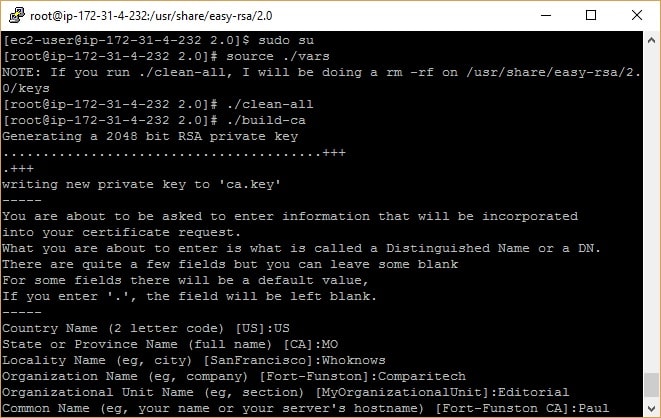
Notice the user is now “root” instead of “ec2-user”. Now to use easy-rsa to create up certificates and keys. Enter each of the following commands one at a time. Read on Create a VPN With AWS.
cd /usr/share/easy-rsa/2.0/
source ./vars
./clean-all
./build-ca
./build-key-server server
./build-dh 2048
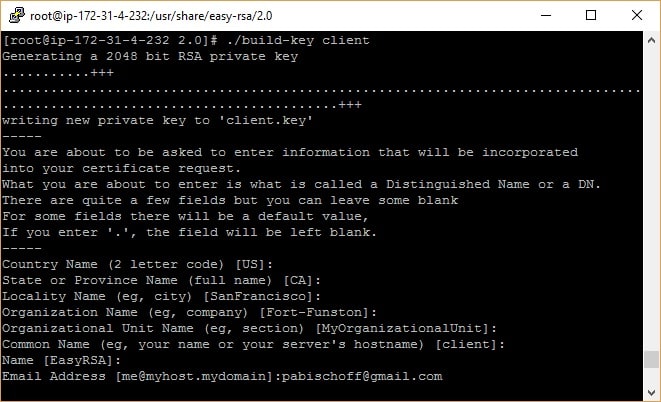
That’s all that’s required to get the OpenVPN server up and working, but each client will need its credentials. For each client system you want to connect, run this command:
./build-key client
In this guide, we’ll only be configuring one client. You now have all the RSA keys and certificates required, but you still need to create a TLS key to be utilized for Perfect Forward Secrecy. This will assure that if a key is negotiated, it can’t be used to decrypt former sessions.
cd /usr/share/easy-rsa/2.0/keys
openvpn –genkey –secret pfs.key
With all of the files available, we need to push them into the OpenVPN directory. First, we’ll generate a keys directory, then copy all of the keys and certificates into it.
mkdir /etc/openvpn/keys
for file in server.crt server.key ca.crt dh2048.pem pfs.key; do cp $file /etc/openvpn/keys/; done
Next, we’ll generate a server configuration file that ties everything together. We’ve already got one drafted up for you below, so all you need to do is copy and paste. Begin by navigating to the OpenVPN directory and generating a new file:
cd /etc/openvpn
nano server.conf
You are now in the nano text editor. Copy and paste the following config, then type CTRL+O to save, press enter to confirm, and CTRL+X to exit. (Hint: you can paste text from your clipboard into PuTTy just by right-clicking)
port 1194
proto udp
dev tun
ca /etc/openvpn/keys/ca.crt
cert /etc/openvpn/keys/server.crt
key /etc/openvpn/keys/server.key # This file should be kept secret
dh /etc/openvpn/keys/dh2048.pem
cipher AES-256-CBC
auth SHA512
server 10.8.0.0 255.255.255.0
push “redirect-gateway def1 bypass-dhcp”
Push “dhcp-option DNS 8.8.8.8”
And push “dhcp-option DNS 8.8.4.4”
ifconfig-pool-persist ipp.txt
keepalive 10 120
comp-lzo
persist-key
persist-tun
status openvpn-status.log
log-append openvpn.log
verb 3
tls-server
tls-auth /etc/openvpn/keys/pfs.key
The server is now set up. We just have to start up OpenVPN. We’ll launch it as a service so that even after you shut PuTTy, it will proceed to run until the server is either shut down or you manually stop the service.
sudo service openvpn start
While you’re still in etc/openvpn, use nano server.sh to create a new text file and paste the following into it:
#!/bin/sh
echo 1 | sudo tee /proc/sys/net/ipv4/ip_forward
sudo iptables -t nat -A POSTROUTING -s 10.4.0.1/2 -o eth0 -j MASQUERADE
sudo iptables -t nat -A POSTROUTING -s 10.8.0.0/24 -o eth0 -j MASQUERADE
Use CTRL+O to save and CTRL+X to exit.
The command will ensure OpenVPN starts when the server boots and the script will provide the necessary routes are set up in iptables to allow OpenVPN traffic.
. To set up the client, we’ll have to move the necessary certificate and key files from our server to our client device. With PuTTy still open and running as root, we first have to change the permissions on these files so that we can access them.
cd /usr/share/easy-rsa/2.0/
chmod 777 keys
cd keys
for file in client.crt client.key ca.crt dh2048.pem pfs.key ca.key; do sudo chmod 777 $file; done
To get the files off of our server and onto our PC, we’ll utilize a free program named WinSCP. Just apply the default installation choices. Once that’s done, a Window should pop up helping you to import your server authentication information from PuTTy. Select the one we made above and proceed.
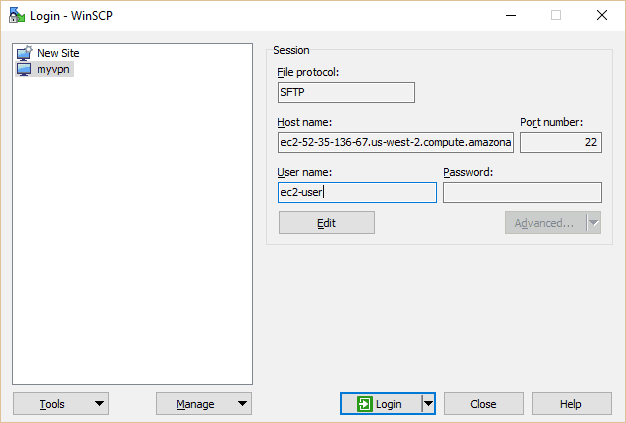
Select myvpn (or whatever you named yours) and hit the Edit button. Type in ec2-user under the username.
Click Login.
If this isn’t your first time using WinSCP, you can set the .ppk file you used in PuTTy by clicking Edit and Advanced. Go to SSH > Authentication > Private key file and navigate to your PPK file. In the hostname field on the main page, you can enter either the IP address or domain of your EC2 instance. Be sure to save your settings, then hit Login.

In the right pane, navigate to the directory containing your key files, in this case /usr/share/easy-rsa/2.0/keys
Highlight the five files you’ll require on the client: client.crt, client.key, ca.crt, dh2048.pem, and pfs.key. Click the green Download button. It doesn’t really matter where they go on the left pane so long as you don’t require admin privileges to enter it. We put the files on our desktop for simplicity’s sake.
The ultimate loose end we need to do join up is removing the ca.key file from the server. The CA, or certificate authority, is employed to sign client certificates,and, if it is ever negotiated, you can never trust certificates assigned by that CA again. While this isn’t important for the VPN to work, we strongly suggest doing it. Be sure you’ve all the keys and certificates for every device you need to connect before removing the file.
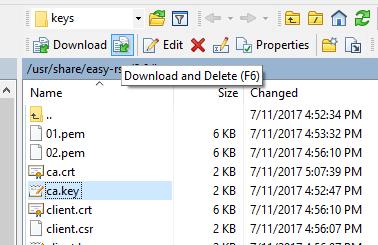
We will move the file onto our PC in the same way as we did for the client certificates and keys. Use the Download and Delete button to move the ca.key file from your server to your PC. Store it in a secure location.
Now, restore their stricter permissions on the server so not just anybody can access them. Back in PuTTy:
for file in client.crt client.key ca.crt dh2048.pem pfs.key; do sudo chmod 600 $file; done
cd ..
chmod 600 keys
On your PC, cut and paste those five files from wherever you downloaded them into your OpenVPN config folder. In this case that’s C://Program Files//OpenVPN//config.
Finally, we need to create a client configuration file. Open your favorite plaintext editor (Notepad works fine) by right clicking and selecting Run as administrator and paste the following config:
client
dev tun
proto udp
remote YOUR.EC2.INSTANCE.IP 1194
ca ca.crt
cert client.crt
key client.key
tls-version-min 1.2
tls-cipher TLS-ECDHE-RSA-WITH-AES-128-GCM-SHA256:TLS-ECDHE-ECDSA-WITH-AES-128-GCM-SHA256:TLS-ECDHE-RSA-WITH-AES-256-GCM-SHA384:TLS-DHE-RSA-WITH-AES-256-CBC-SHA256
cipher AES-256-CBC
auth SHA512
resolv-retry infinite
auth-retry none
nobind
persist-key
persist-tun
ns-cert-type server
comp-lzo
verb 3
tls-client
tls-auth pfs.key
Save it into the same location as your key and certification files: C:\\Program Files\\OpenVPN\\config
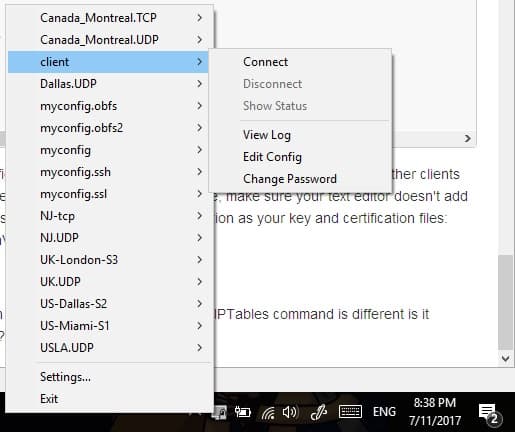
Now run the OpenVPN GUI in administrator mode by right-clicking it and selecting Run as administrator. Right-click the icon in your system tray and connect with the client configuration we just set up. A status screen with lots of text will appear on the screen, and then the icon will become green.
End-Note -Create a VPN With AWS
Congratulations! You are now connected to your homemade VPN. There you go with the way to Create a VPN With AWS.


